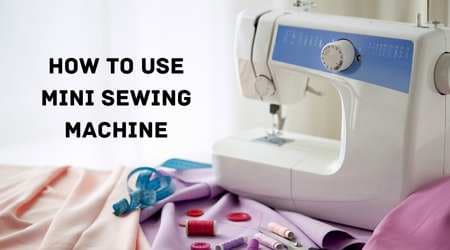
A mini sewing machine is a great tool for anyone who loves to sew. They are perfect for small projects and can be taken with you on the go. Here are some tips on how to use a mini sewing machine.
- Gather your materials: You will need a portable mini sewing machine, a spool of thread, fabric, scissors, and any other sewing accessories you may need (such as needles or bobbins).
- Set up the machine: Begin by placing your portable mini sewing machine on a stable, flat surface. If your machine comes with a built-in light, turn it on to provide better visibility while you sew. Next, fill the bobbin with thread according to the manufacturer's instructions, and thread the machine with the top thread.
- Prepare your fabric: Cut your fabric to the desired size, and lay it flat on your work surface. If you are using a pattern, follow the instructions to mark any necessary seam allowances or other markings on the fabric.
- Begin sewing: Place the fabric under the presser foot of the machine, and lower the presser foot to hold the fabric in place. Use the foot pedal or hand crank to start the machine, and guide the fabric through the machine as it sews. Adjust the speed and tension as needed to get the desired results.
- Finish your project: When you have finished sewing, cut the threads, and remove the fabric from the machine. If you are making a garment or other sewn item, follow the instructions to complete the project by adding any necessary buttons, zippers, or other finishing touches.
Remember to always follow the manufacturer's instructions for your specific sewing machine, and to use caution when operating any machine to avoid injury.
How to Operate a Mini Sewing Machine – Tutorial
How Do You Use a Portable Mini Sewing Machine?
Using a portable mini sewing machine is easy. Once you have the right supplies, all you need to do is plug in the machine and make sure the needle and thread are properly set up for your project.
You can then use the provided foot pedal to control the speed which will allow you to stitch accurately. Make sure to practice using a scrap material first before applying it on your project.
This will help you get used to the feel of the sewing machine and learn how to control it better. With practice, you'll be able to make beautiful projects with ease!
What Can You Do With a Mini Sewing Machine?
A mini sewing machine is a great tool to have in your arsenal of craft supplies. With one, you can easily tackle a variety of DIY projects, such as repairing clothing and mending seams, stitching up quilts and blankets, making curtains and custom home decor items, or even creating your own handbags and accessories! With the right sewing machine and the right materials, you'll be able to create whatever you set your mind to.
How Do You Thread a Mini Sewing Machine for Beginners?
Most mini sewing machines will come with a small threading guide near the needle. If yours does not, don't worry, it's still pretty easy to thread a mini sewing machine. Start by raising the presser foot and inserting your thread from the back of the machine towards the front.
Then, take hold of the end of the thread and pull it towards you so that it wraps around the tension disk (this is usually located on top of or behind where the needle goes in). After that, continue pulling the thread towards you and under the first lever on your machine (this is typically found just above where you feed your fabric through). Make sure to keep hold of that end of the thread as you do this – if you let go, it'll likely get tangled up inside your machine.
Now it's time to insert your bobbin. Most minis have a drop-in bobbin system, which means all you have to do is place your bobbin inside (usually following any arrows or diagram markings) and then close up the compartment again – no need to wind any threads around anything else. Once your bobbin is in place, pull out about 6 inches or so of thread and hold onto both ends – one coming from the spool above and one from your newly inserted bobbin.
Now it's time to start actually sewing! First make sure your needle is in its highest position by turning that little handwheel at the side of your machine until it won't go any further. Then take hold of both threads (from above AND below) and gently guide them under that first lever we mentioned before – be careful not to tug too hard or let go as you do this step or else those threads will likely get tangled again.
Once both threads are underneath that first lever, give each one a little tug until they're snug but not too tight. This helps ensure there won't be any bunching later on when you start sewing faster. And now you should be all threaded up and ready to sew!
How to Use Sewing Machine Step by Step
Sewing is a great way to make your own clothes, curtains, or other items for your home. If you don't know how to use a sewing machine, it can be a bit daunting. But never fear!
This step-by-step guide will teach you everything you need to know about using a sewing machine.
First, gather all of the supplies you'll need: a sewing machine, fabric, thread, scissors, and pins. You may also want to have a seam ripper on hand in case you make any mistakes.
Next, set up your sewing machine. Make sure it's properly threaded and that the tension is correct. Then wind some thread onto the bobbin and insert it into the machine.
Now it's time to start sewing! Begin by pinning your fabric together at the seam you want to sew. Then slowly feed the fabric into the machine as you stitch along the seam.
Remember to backstitch at the beginning and end of each seam to secure it. If you need to turn a corner while sewing, simply stop with the needle down in the fabric. After that lift up the presser foot, pivot the fabric 90 degrees, lower the presser foot again, and continue stitching. Easy peasy!
Once you're finished sewing your seam, remove your fabric from the machine and cut off any excess thread.
Congrats—you've just sewn your first seam!
Conclusion
In conclusion, a mini sewing machine is a great tool for DIY projects. With the right supplies and practice, you'll be able to use it to create a wide range of beautiful items for yourself or to give as gifts. Whether you're looking to repair clothing, make quilts and blankets, or simply create custom home decor, a mini sewing machine can help you achieve your goals.


Comments are closed.